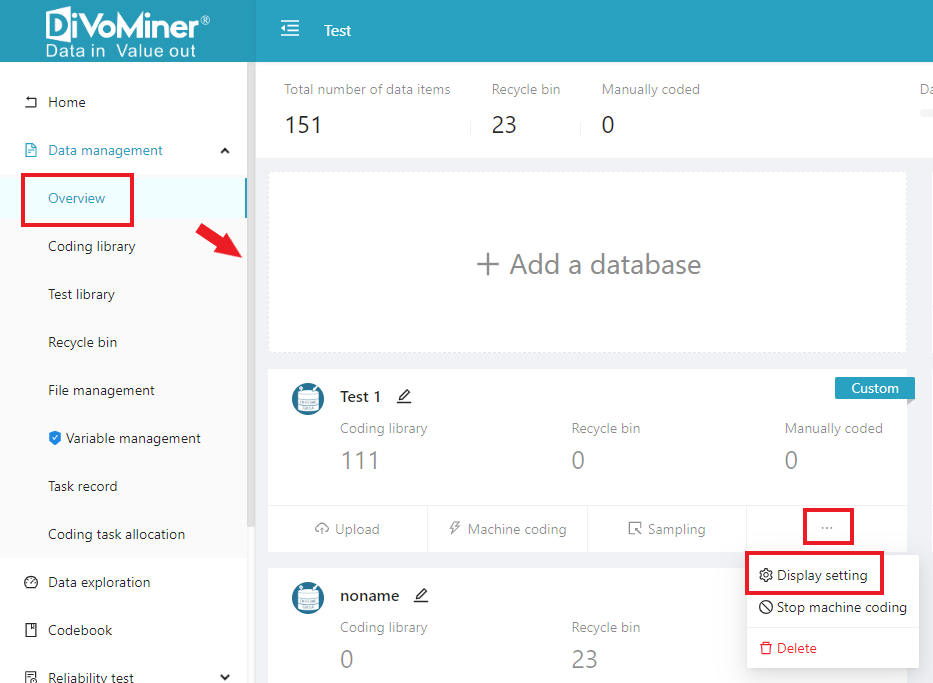
After the topic is successfully created, you will automatically enter the [Data Management] – [Overview] page. In here, you can see the overall status in each database, such as Coding Library, Recycle Bin, coded volume, data capacity occupied and file capacity in the project, and other information. Multiple databases can be created and various types of data can be uploaded in a project. One database is preset in each project.
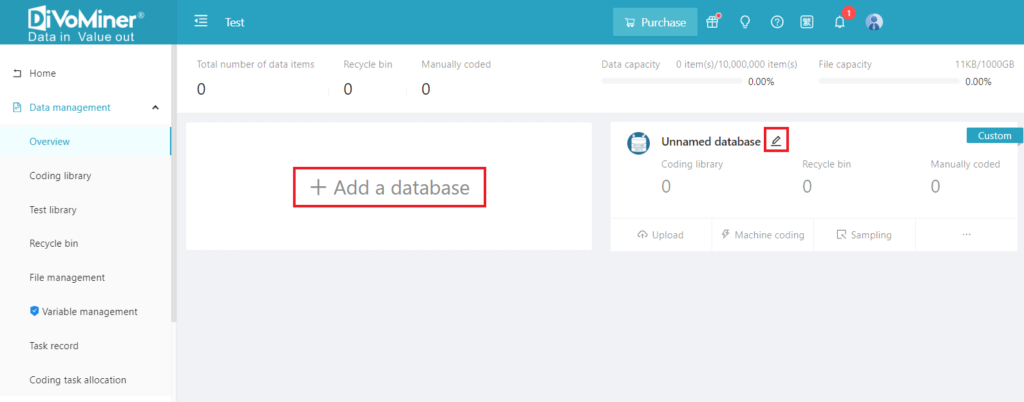
Step 1: Establishing Databases
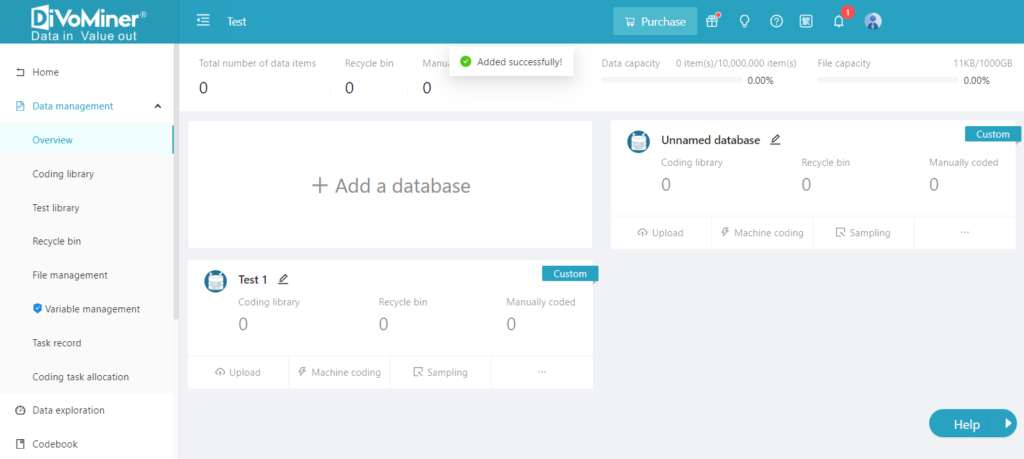
To create your own databases, users can modify the name of [Unnamed Database], or click [Add a Database] and enter database name.
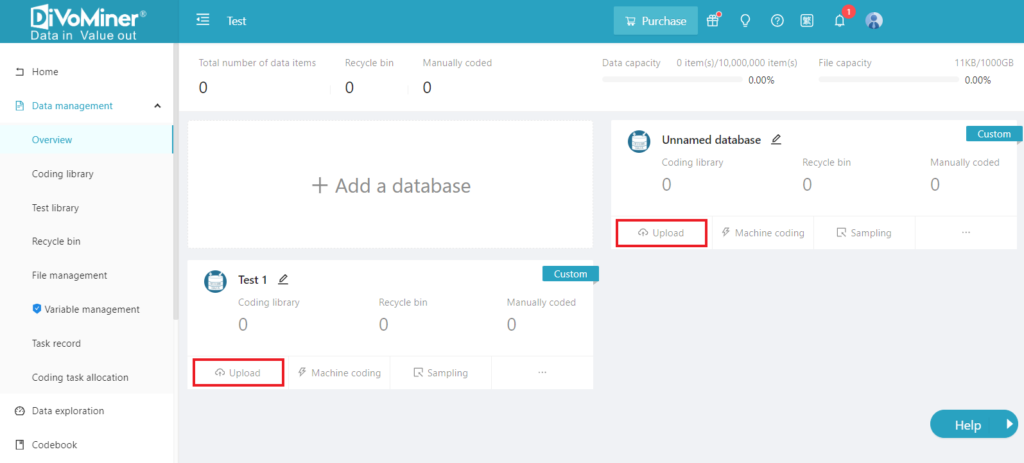
Step 2: Data Uploading
After database created, click on “Upload Data” in the “News Database” operation box to select and upload data files.
Users can upload files in formats such as Excel, CSV, Word, Text, PDF, images, video links, audio, and exported data from third-party database to the platform to create their exclusive databases.
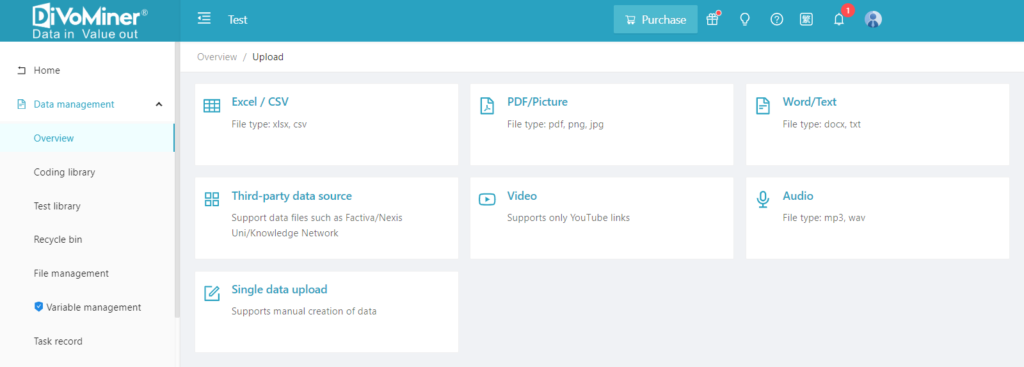
Select the corresponding format and double-click on the file in the folder or drag the file to the upload area.
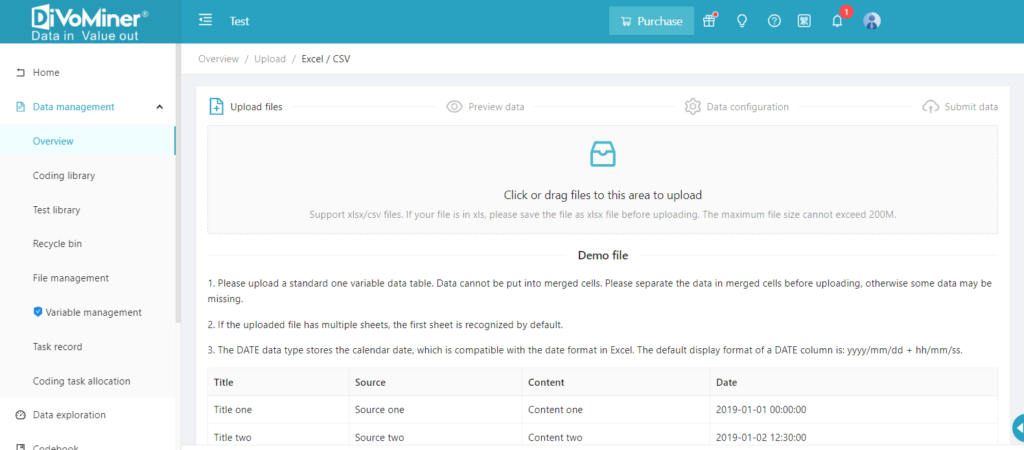
NOTE: Excel documents need to be in xlsx format, with 200M limitation for each document.
To ensure a smooth procedure for data processing and to finalize informed and rigorous research results, it is important to confirm to:
- Maintain clear categorization and precise field attributes during preprocessing of the data source.
- Upload data in formats and sizes that meet the requirements;
- Ensure accurate encoding format during data configuration.
You can preview the data after selecting the file to upload. The field types for each column of data can be defined, choosing from text, numeric, Boolean, date, and array field forms.
- Text: Text-based data, generally including Chinese characters, English letters, Pinyin symbols, etc. Arabic numerals can also be used as text-based data;
- Numeric: data measured on a numeric scale;
- Boolean: a logical data type that can have only the values true or false
- Date: data of date and time.
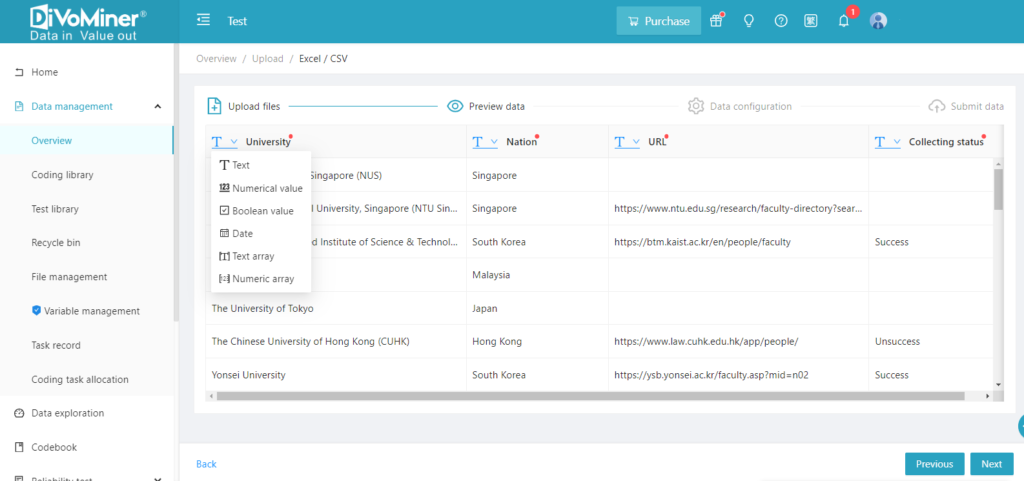
TIPS: A field marked with a red dot indicates that it is a newly uploaded field and can be modified. Fields that have been previously uploaded cannot be modified again. If there are fields in the new data that overlap with previously uploaded data, they can be converted to existing field types.
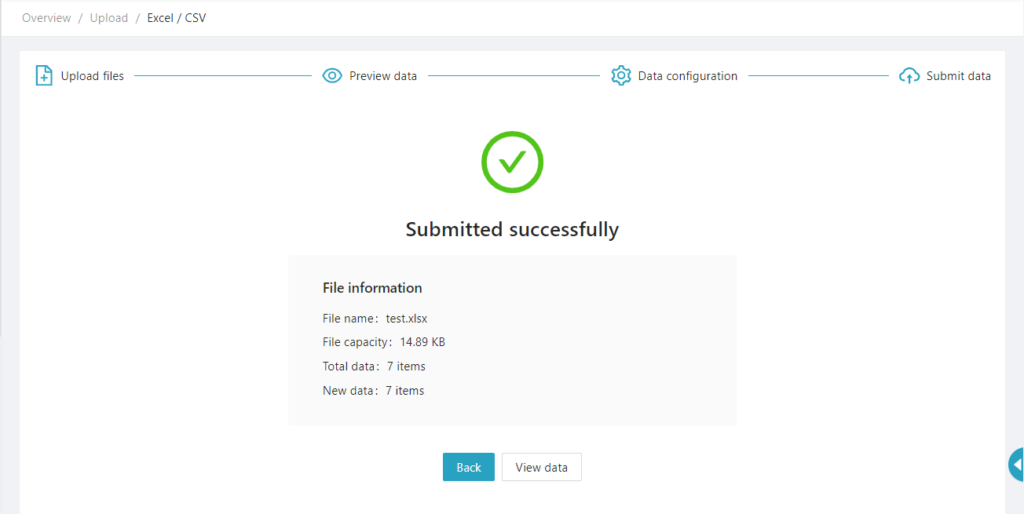
On the [Data Configuration] page, you can adjust the page layout of data, which will be the display result when you view data in the [Coding Library] and manual coding process in the [Coding] page. The format of data display can be flexibly customized by users. Select the fields to be displayed in the [Title], [Info] and [Content] sections and click [Submit Data] to complete the data upload.

TIPS: During machine coding, machine will only code the data in the [Title] and [Content] sections. Users can adjust the data in each section according to the requirement.
Step 3: Enter [Coding Library] to view the uploaded data and check the data volume. Click on any piece of data to view the data display result.

If there is a need to perform data cleaning, you can [Remove] irrelevant or extraneous data on [Coding Library] page.
Step 4: If you need to modify the style of the data viewing page or adjust the data range for machine coding, you can make these modifications on [Data Management] – [Overview] page under the corresponding database’s “More Actions” – [Display Settings].