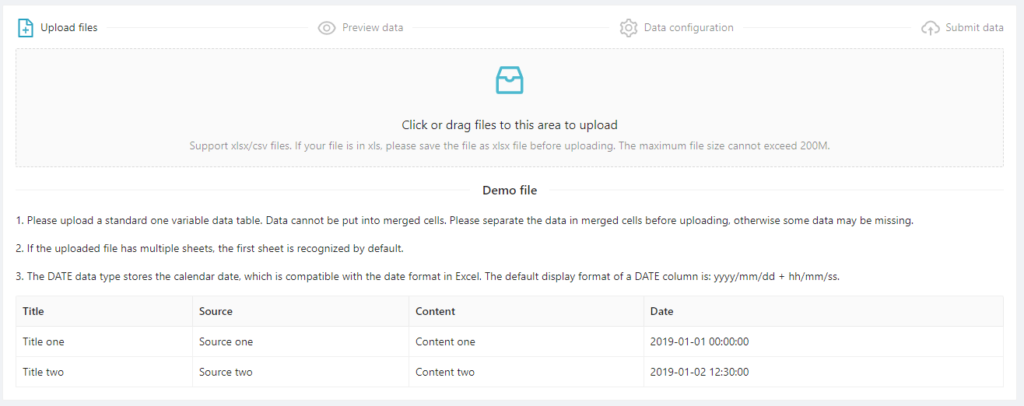
1. Upload files: upload files from your local drive to the platform.
Note: currently only support Excel files in .xlsx and csv format.


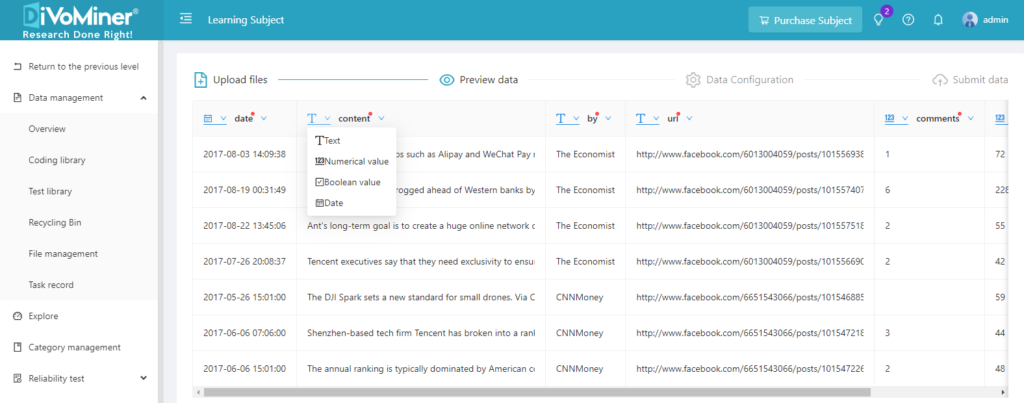
2. Preview data: Preview the uploaded data, click the drop-down arrow on the left of the data field name to set the field type of the data. There are four types of data fields: text, numeric, Boolean value, and date. After uploading the data, select the corresponding data field type according to the content. If the field content is text, select text as the field type; if it is a number, select numeric; if the content is true/false, select Boolean value; if it is a date, select date. After defining each data field type, click “Next” to configure data.
Note: For the data uploaded to the platform for the first time, a small red dot will appear in the upper right corner in each column. At this time, carefully check the field type of the data field. For the previously updated data, the corresponding data field type cannot be modified. To redefine the field type of the previously uploaded data, you need to delete the database and upload the corresponding data again.

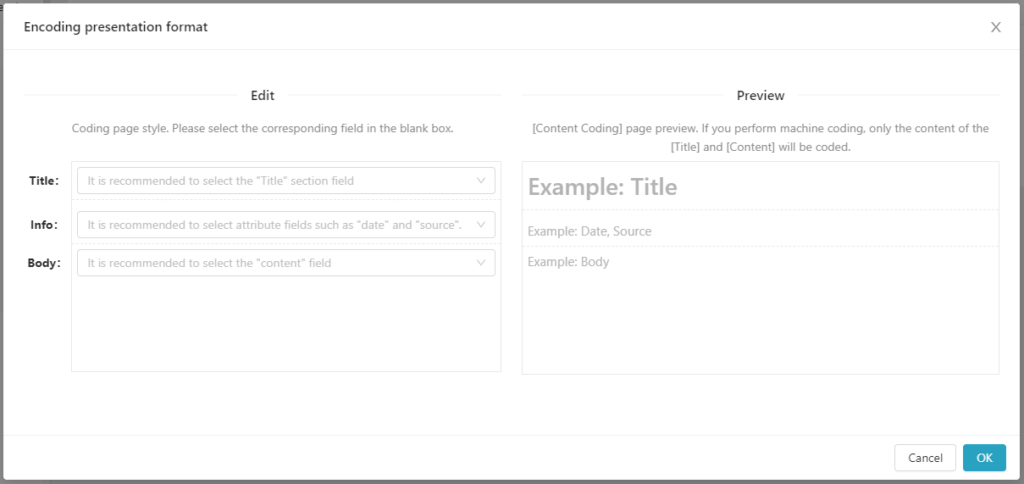
3. Setting Data: After selecting the data field type, configure the content to be displayed on the Coding page. The left side of the page is the format setting of the Coding page. Select data field for the corresponding content, and preview the content arrangement of the Coding page on the right side.


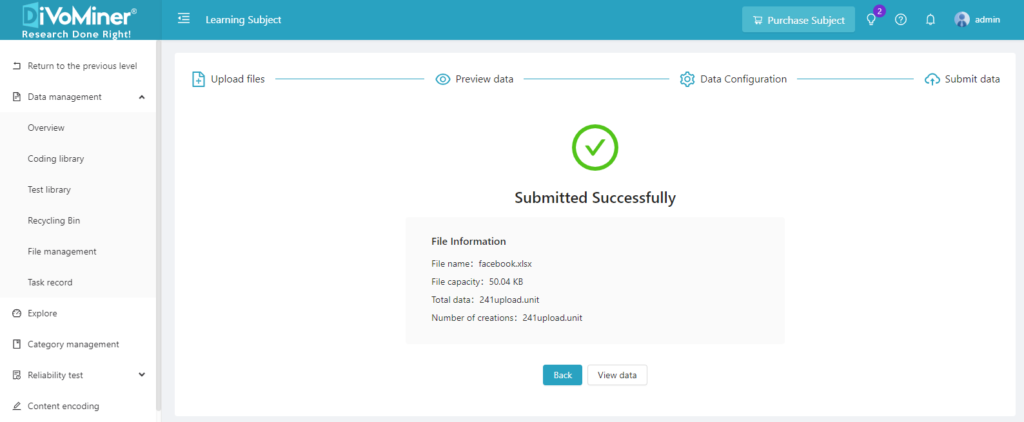
4. Submit data: After the data configuration, click “Submit data” to submit the configured data to the platform.

5. After the data is submitted successfully, click “Return” to go back to the Overview Page; or click “View data” to check the uploaded data on the Coding library page.
